How to easily Upgrade Your Plan on OwlStat thanks to the Stripe Customer Portal
How to Upgrade Your Plan on OwlStat

Are you ready to upgrade your plan on the OwlStat platform? In this tutorial, we will walk you through the process of upgrading your plan using the Stripe Customer Portal. We’ll show you how to navigate to the billing page, manage your Stripe subscription, and choose the new number of slots in your plan. Let’s get started!
Let’s go!
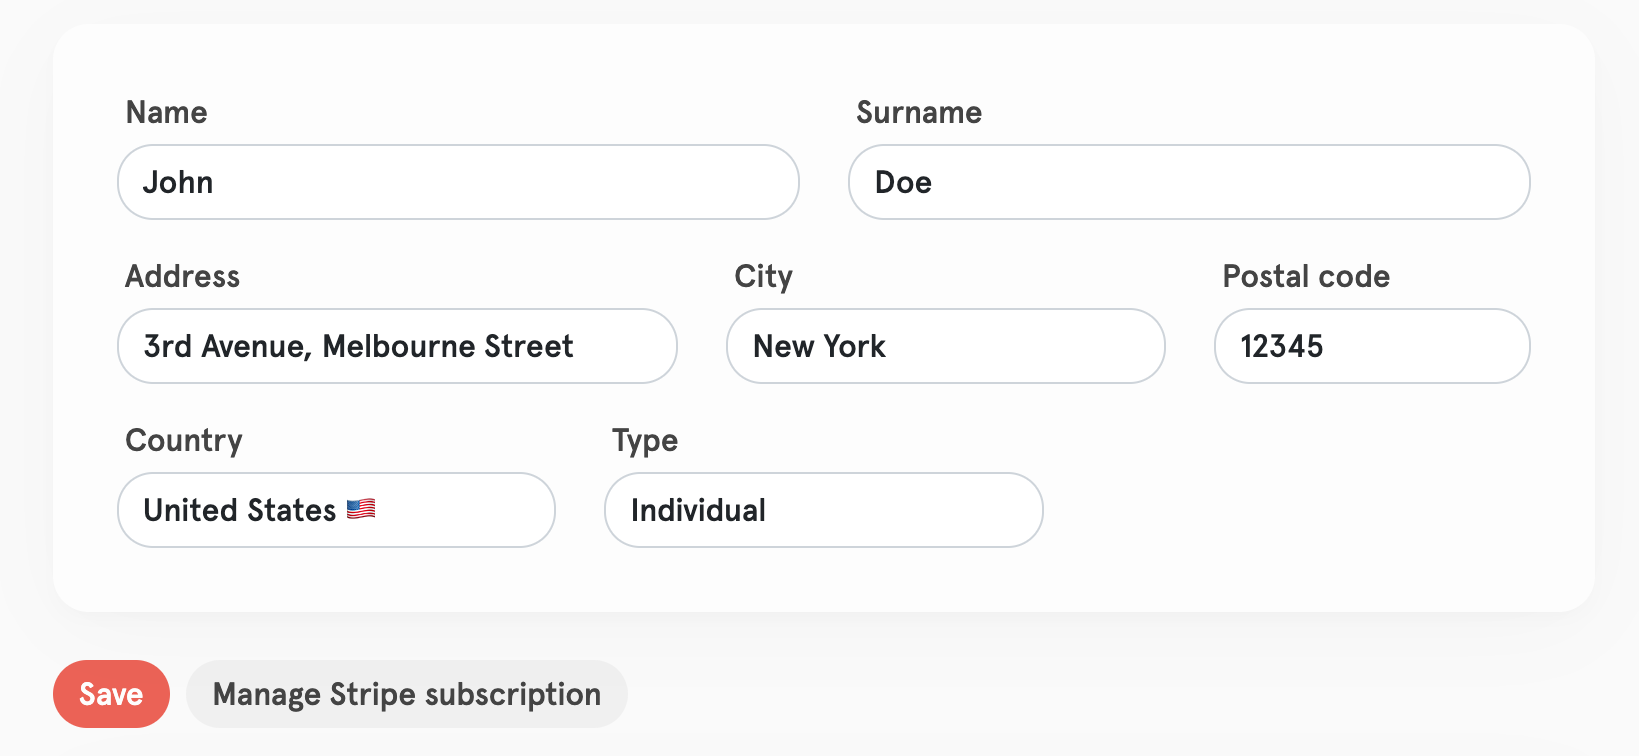
- Start by logging into your OwlStat account and navigate to the billing area into your settings.
-
You should see a button labeled “Manage Stripe subscription”. Click on it.
- This will take you to the Stripe Customer Portal where you can manage your subscription. Once on the Stripe portal, look for the “Update plan” button and click on it.

- On the next screen, you will be prompted to choose the new number of slots in your plan. Keep in mind that you should insert the new number of slots you want, not the addition. So if you want to upgrade from 45 slots to 50 slots, you should insert 50 into the field, not 5.
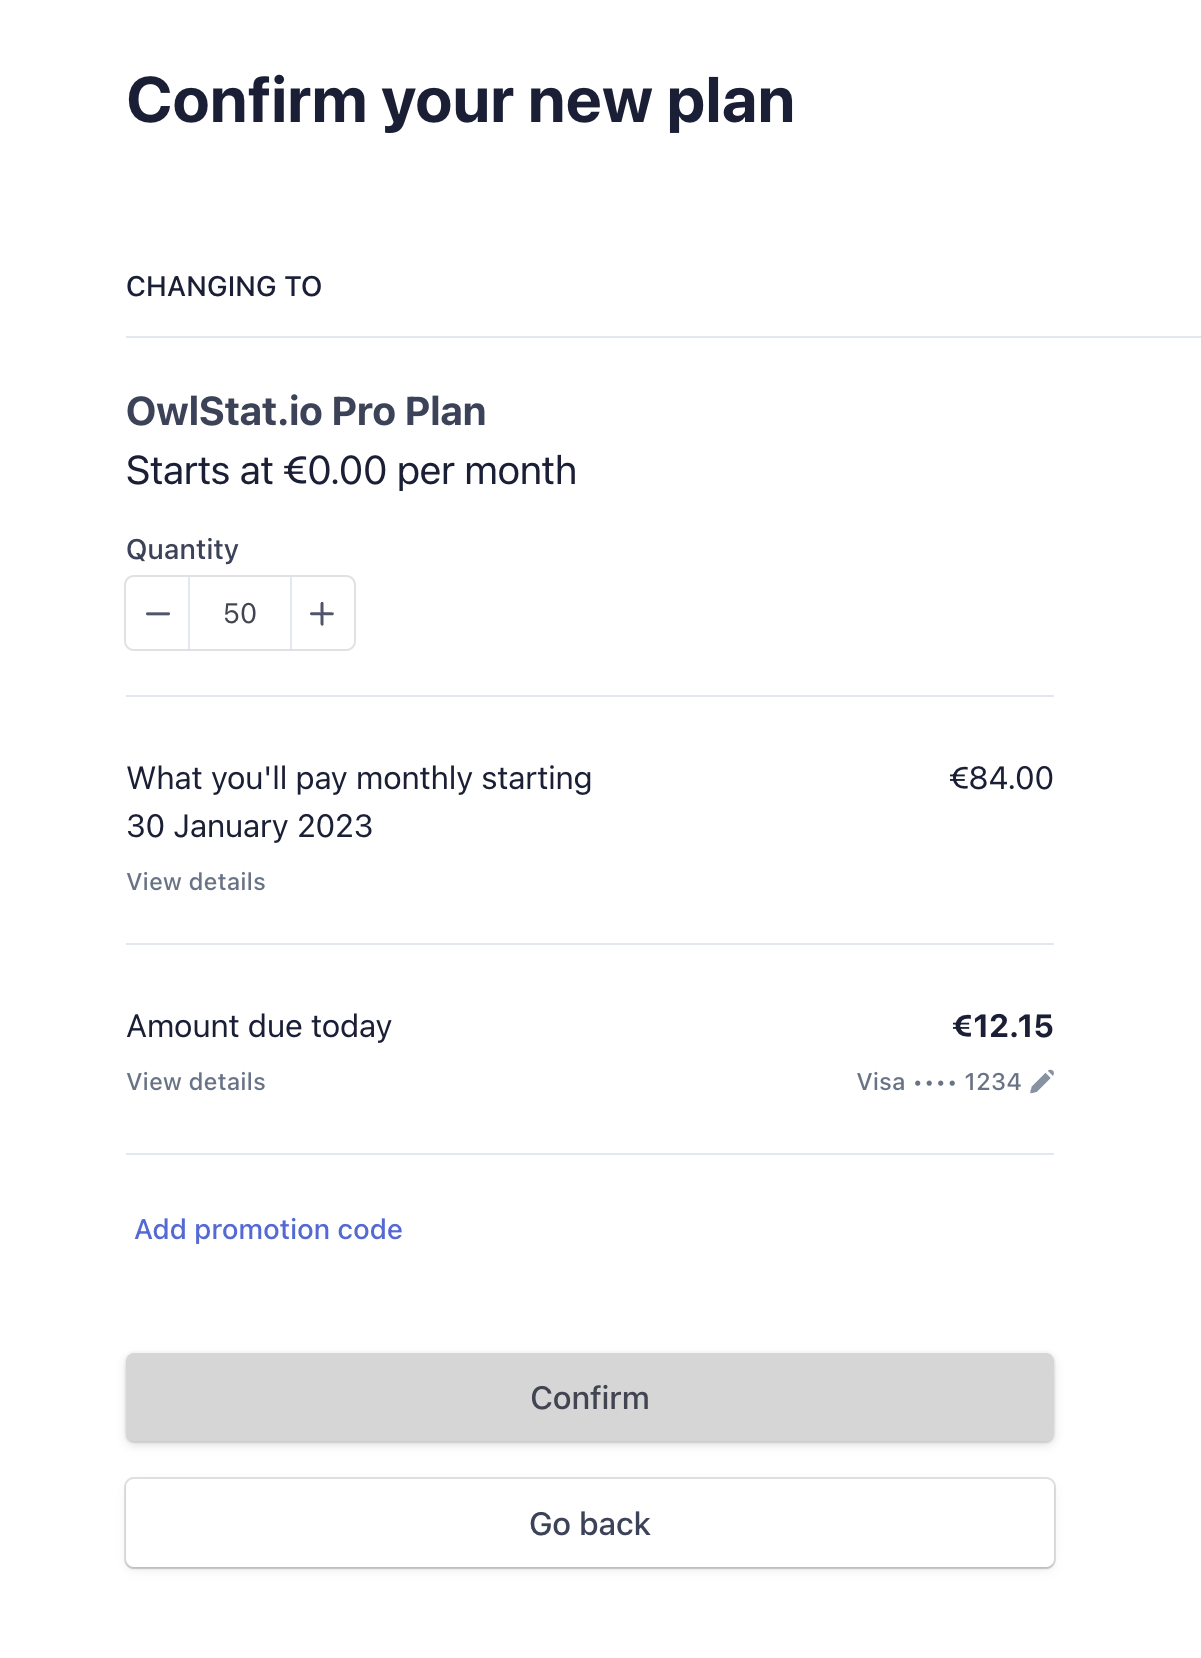
- Once you have entered the new number of slots, click on “Confirm” to complete the process.
Congratulations 🎉
You’ve successfully upgraded your plan on the OwlStat platform! You will have access to the increased number of slots immediately.
Keep in mind that you will be charged the difference in price between the new plan and the old one immediately (if there’s any difference to pay). If you have any questions or need further assistance, please reach out to our support team. We’re always happy to help.